Hurdy Gurdy
Creating a medieval instrument from a kit

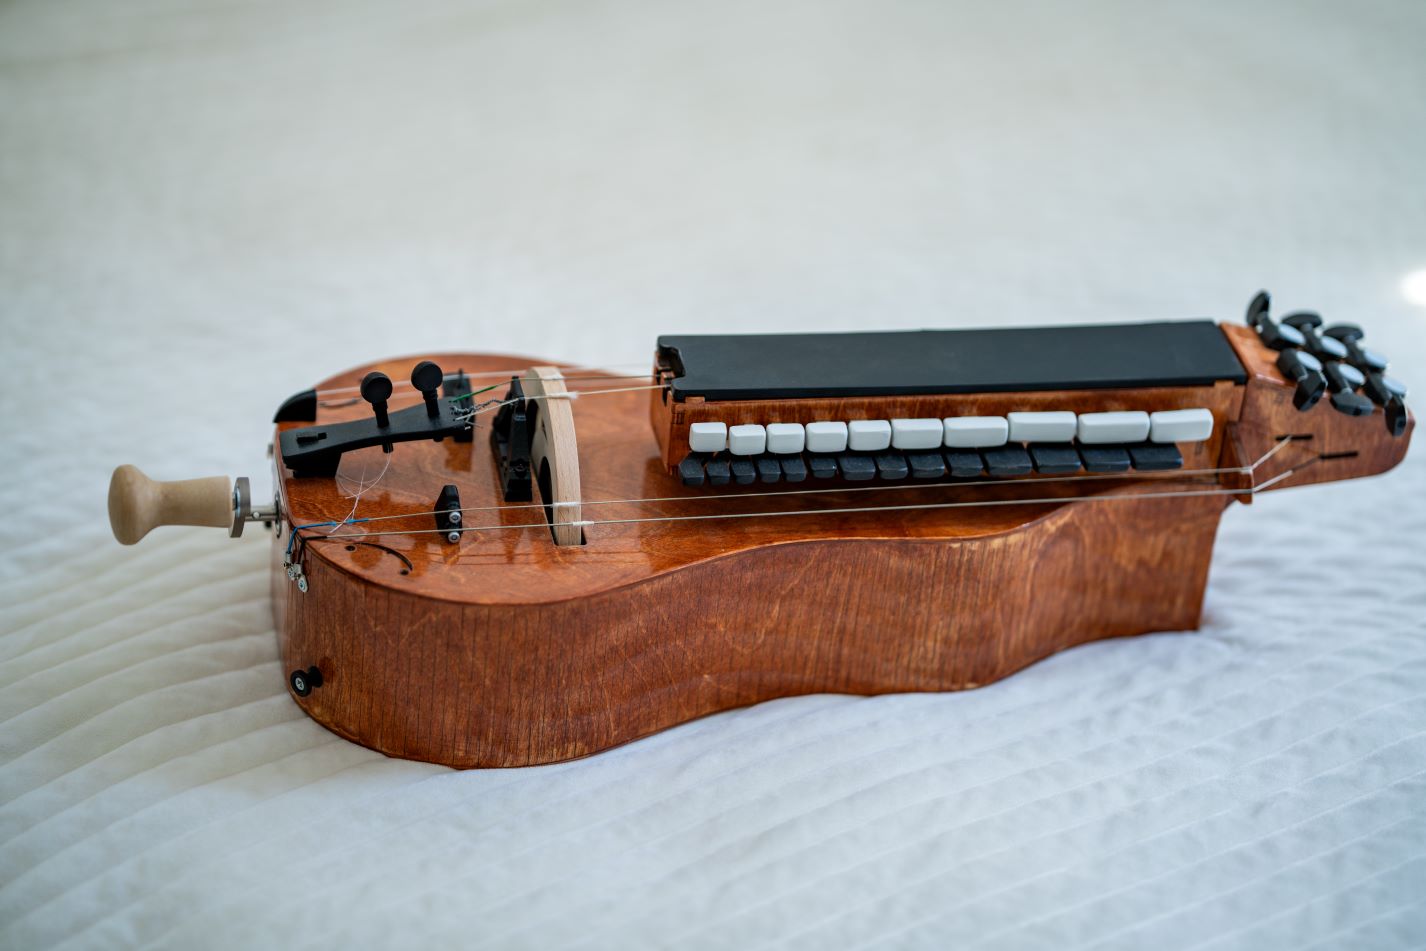
I've always liked unique instruments, woodworking, and puzzles. This hurdy gurdy kit is all of those things. It's a medieval drone instrument. A hand-cranked wheel acts as a continuous bow against the strings while keys press tangents into the melody string. It sounds like a bagpipe crossed with a violin. I had to build one.
I picked up a kit and got to work.
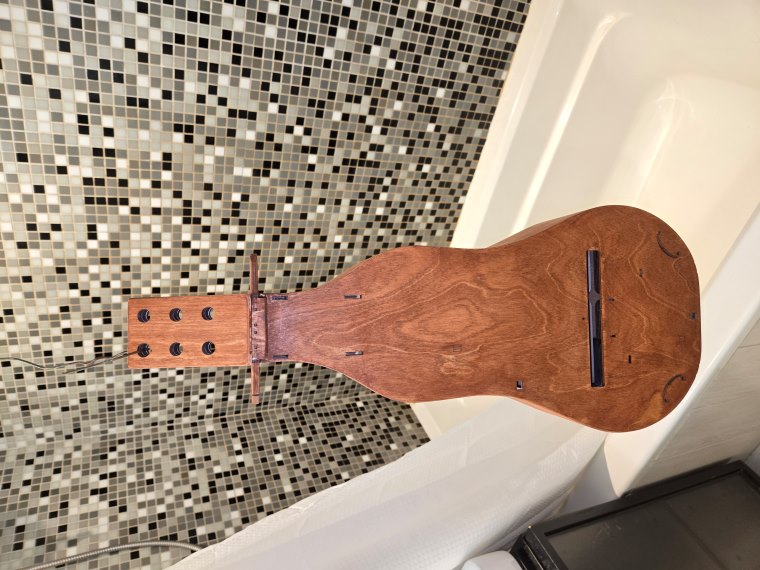
The Kit
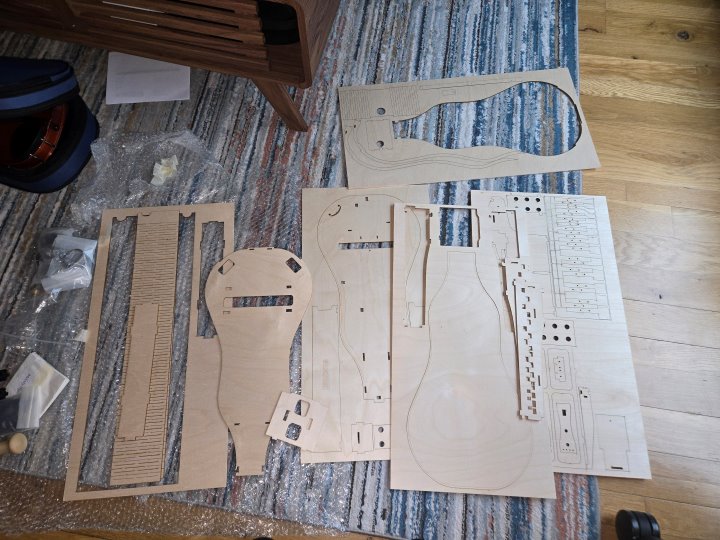
The kit arrived as a flat-pack with laser-cut wooden parts, hardware, and strings. The instructions were detailed, but assembling it in practice was much more of an art than simply following steps on a page.
Assembly
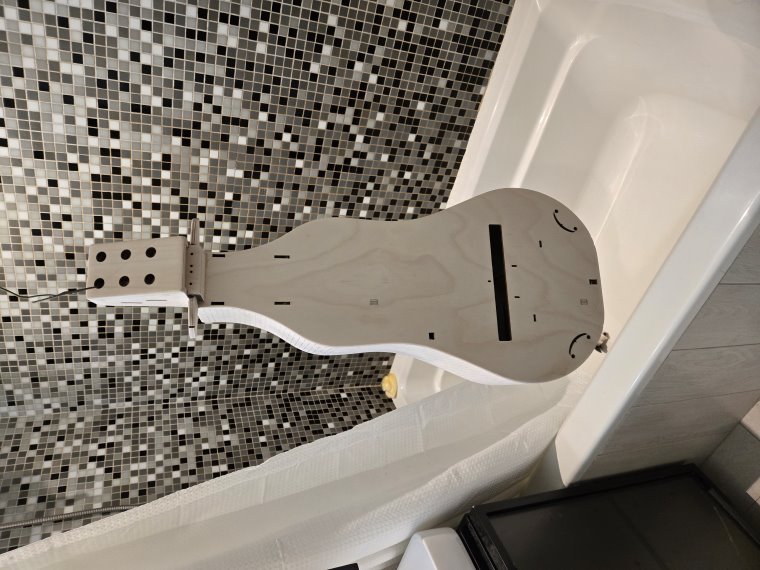
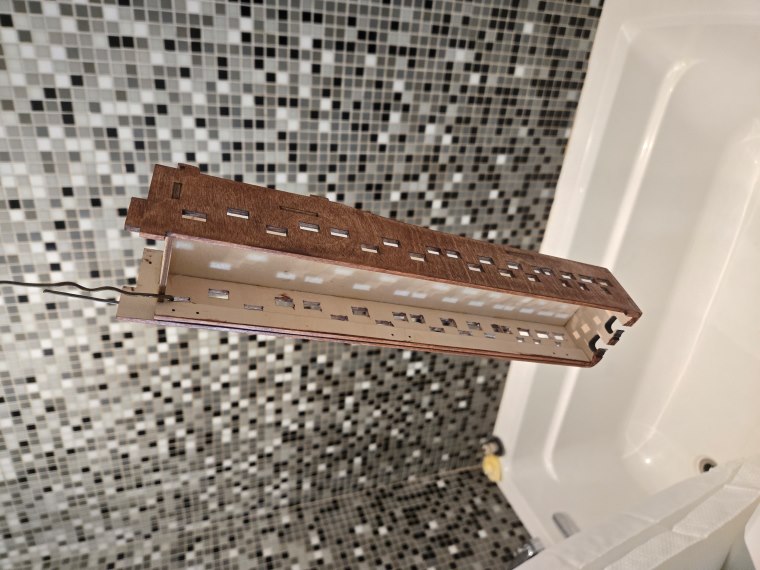
Putting the pieces together was only part of the process; making sure the structure could handle the string tension, and that the keys and strings were aligned well enough to function properly, took a lot of test-fitting, shaving, sanding, and adjusting.
Finishing
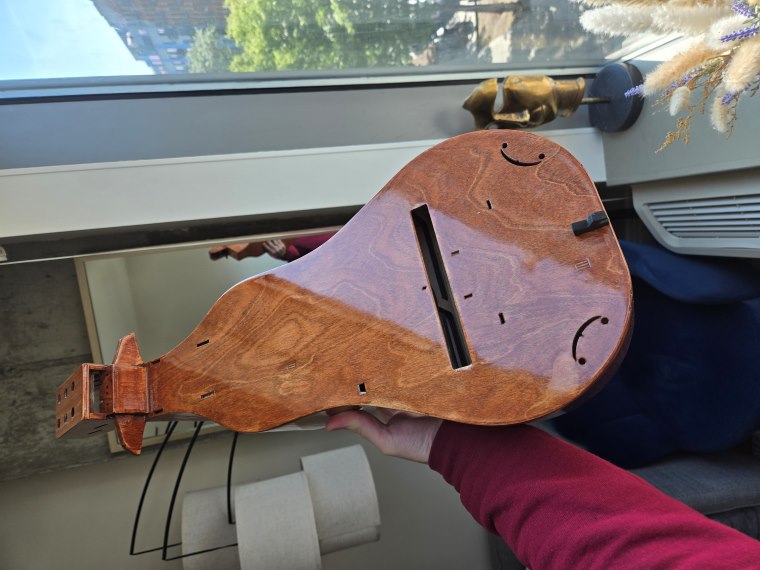
Once the structure was solid, I stained the keybox and body separately.
The keys got a coat of black and white paint to contrast against the natural wood of the keybox.
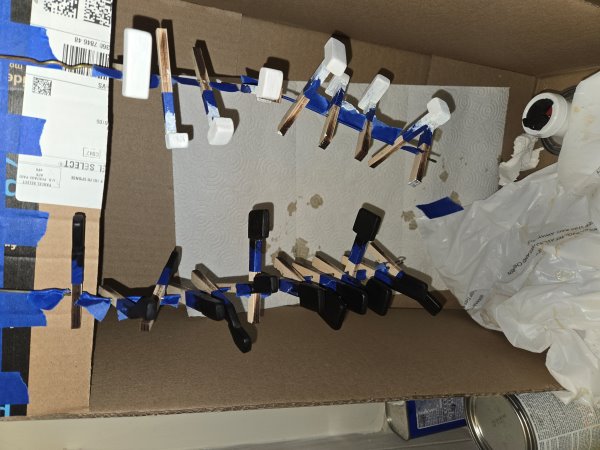
Clear coat
Embarrassingly, this part took the most time. I wanted to have a perfectly smooth, shiny surface. I know from past experience that you can't just lay the polyurethane down on the wood straight from the can. It's too thick and will dry in wavy lumps. So it needed to be thinned with mineral spirits.
What ratio? Who knows, I just eyeballed it, and did it by feel. I took some polyurethane out in a small container and added mineral spirits until it was just a tiny bit more viscous than water.
Then I applied the thinnest coat I possibly could. But because it's so thin, I could only do one side at a time; front, back, right, left. Between each side, I let it dry completely overnight, because that was the only way to tell whether it had come out perfectly. And let me tell you, it did not, many, many times.
The first time, I could see a ton of dust particles in the finish. So I sanded it down and added another coat, this time letting it dry under a box to protect it from dust. The next time, I noticed waves in the surface. When I had propped it up under the box, I hadn’t left it perfectly level. So I sanded it again. And again. And again.
Eventually, I got it to a place where I was happy with it. But keep in mind: each coat, on each side, had to dry overnight. Assembling the instrument, gluing it, and sanding it took a few hours a day over the course of several days. Staining it took a day. Stringing it, adjusting it, and tuning it took another day. Getting the clear coat right took almost two weeks.
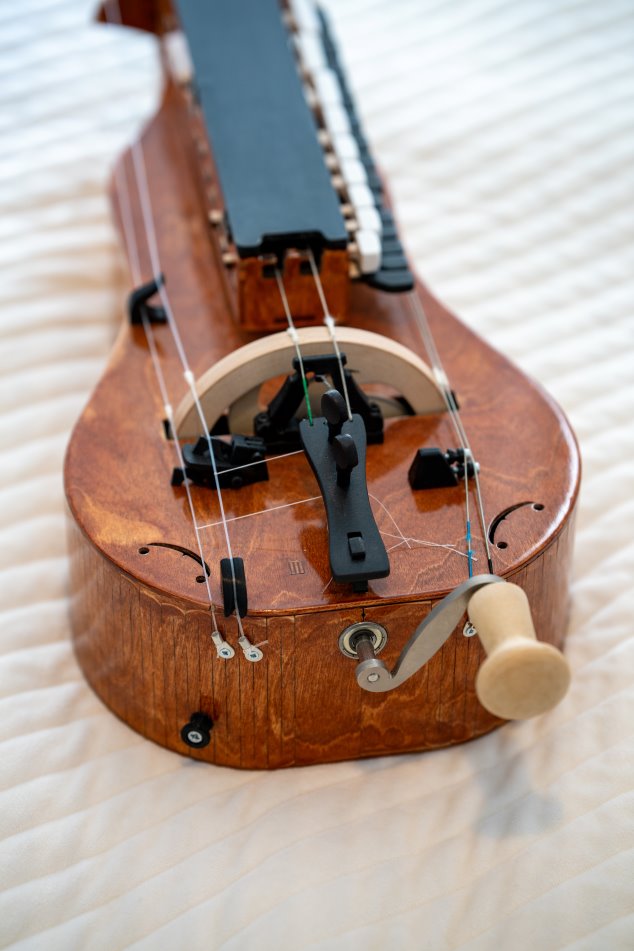
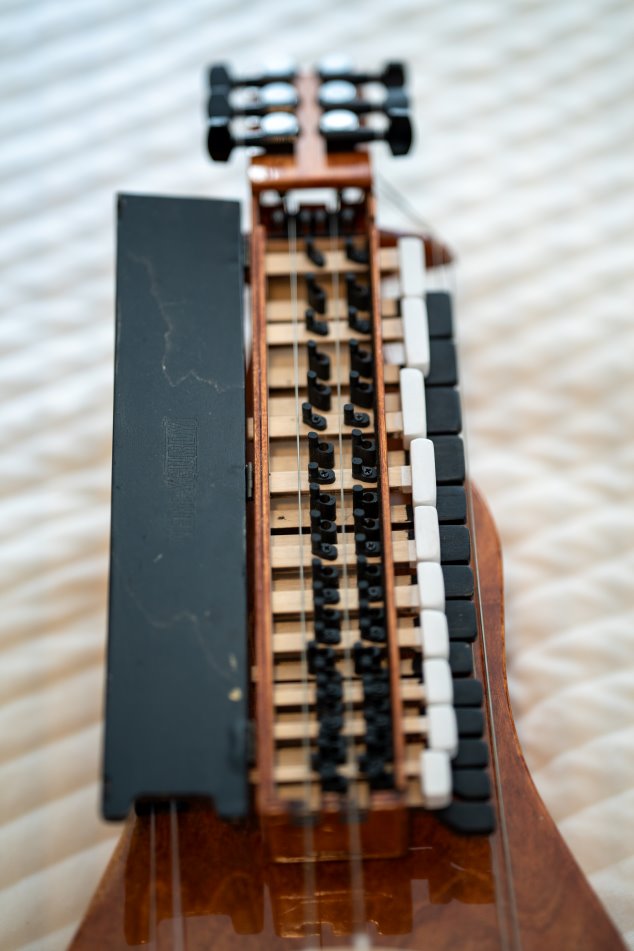
Inside the Keybox
The tangent mechanism is oddly satisfying to look at — each key is a small lever that lifts a tangent into the string to change pitch, then falls back with gravity when released. Simple and elegant.
Finished
Tuning took a while. First, I had to figure out how much cotton to add to the string, then the right technique for getting the cotton onto the string in the first place, and then how much rosin to use, and where.
What worked for me was applying a heavy layer of rosin to the wheel, then wiping it with a cloth to remove the excess. After that, I lightly sanded the high string and rubbed rosin onto both the high and low strings. I took the smallest amount of cotton I could, ran the wheel backward and forward, and fed the cotton under the string until it caught just right and wound itself around the string.
Then I had to adjust the bridge to get the right amount of pressure from the strings onto the wheel. After that came the fun part: tuning every single note.
Each key has a tangent that presses against the string. The tangent can be adjusted so it presses higher or lower on the string. Using a tuning app, I ran the wheel and adjusted each tangent until everything was in tune.
Once dialed in though, it has such a unique sound.
Worth every hour.